|
|||
 |
|||
|
Using Veescope Key in Motion
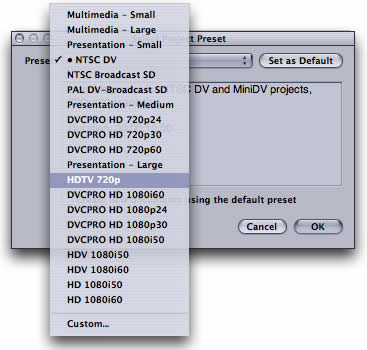
This tutorial will show you how to use the Veescope Key plug-ins inside Motion. The same basic technique can be applied to using Veescope Key in Final Cut Pro, as well. You will need to download these media files to complete this tutorial. Download and expand the following disk image. Start Motion and create a new project with the HDTV 720p preset.
You should now have a brand new project.
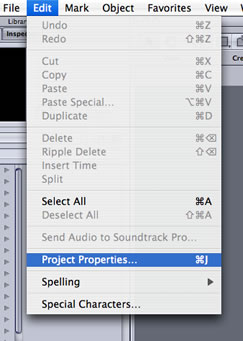
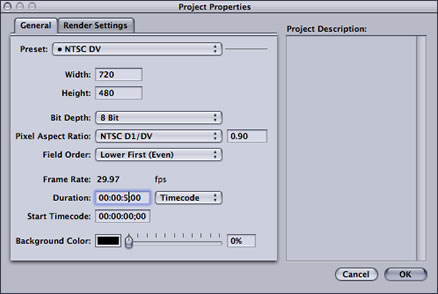
Select the “Project Properties” from the “Edit” menu.
Change the duration of the project to 5 seconds.
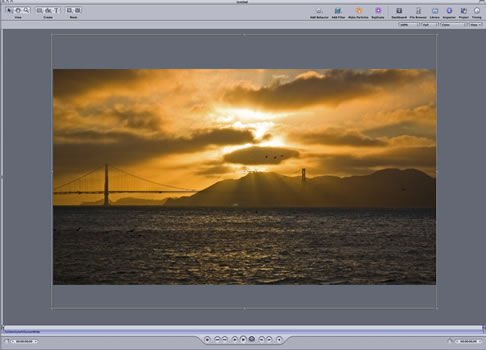
Place the background image in the scene and center it.
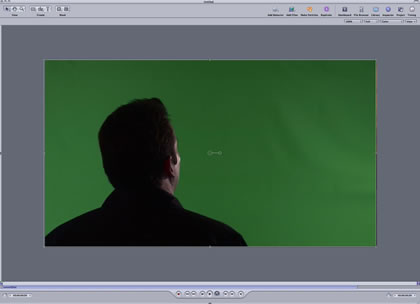
Next, import the foreground movie and center it.
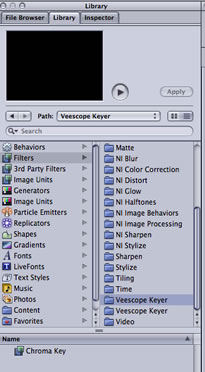
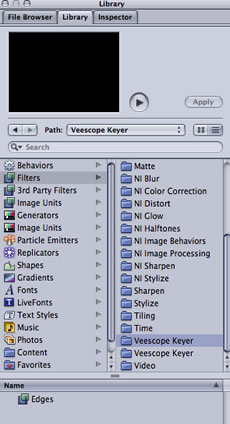
Next, select the “Library” Tab and the filters sub-tab. Then select the “Veescope Key” “Chroma Key” filter and drag it on top of the Preview window.
Select the “Veescope Keyer” “Edges” filter drag it on to the Preview window.
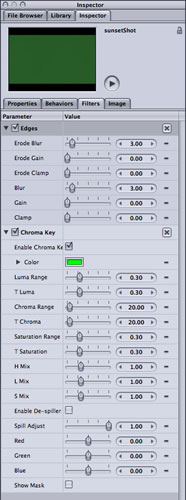
Click on the “Inspector” tab. You should see both the "Chroma Key" and the "Edges" filters in this view.
Find the "Edges" filter in the tab view.
Disable the "Edges" filter for now.
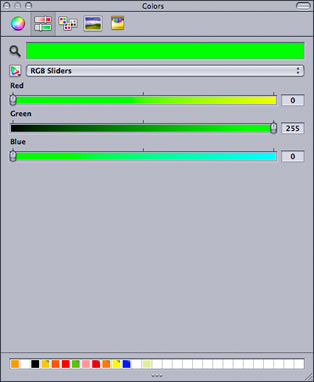
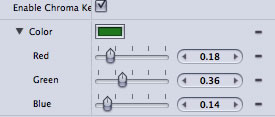
Under the “Chroma Key” filter, select the “Color” well.
This should cause the "Colors" panel to show up.
Click on the “Magnifying Glass” icon and select part of the green back ground in the movie. Once selected, the background picture should show through.
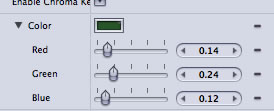
Click back on the black triangle in the “Chroma Key” filter’s color control to reveal the color component values.
Change “Red” to .18, “Green” to .36, and “Blue” to .14.
Change the “Luma Range” to .17 and the “T Luma” to 0.0.
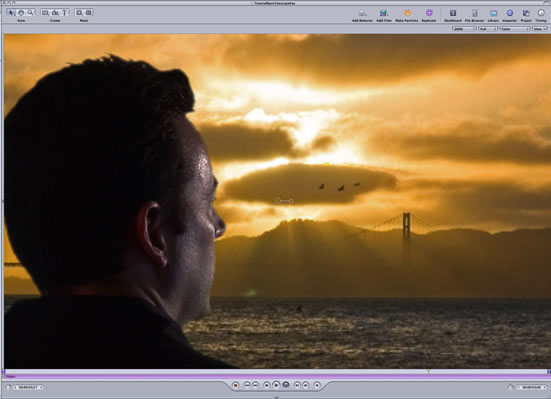
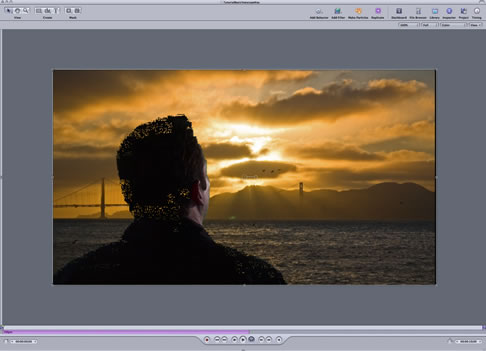
The Preview window should now look like this.
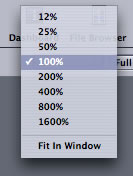
You should still see some green edges around the foreground movie. Zoom into the movie at 200%, by changing the option at the top left of the preview window.
You should now see the image at 200%.
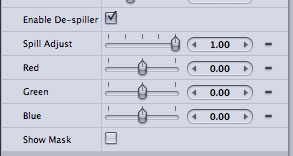
Click on the “Enable De-spiller” option in the “Chroma Key” filter.
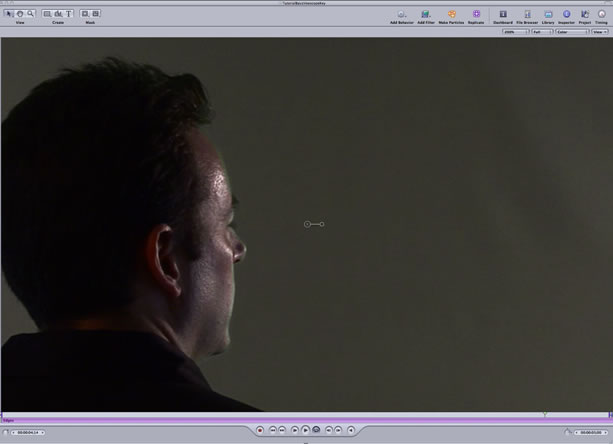
Disable the “Enable Chroma Key” option, so that you can see the original movie.
You should now see the following in the preview window.
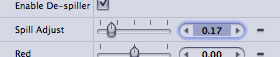
Enable the De-spiller in the "Chroma Key" Filter. Move the “Spill Adjust” slider until the green edges are as gray as possible. A value of .17 should be fairly close to optimal.
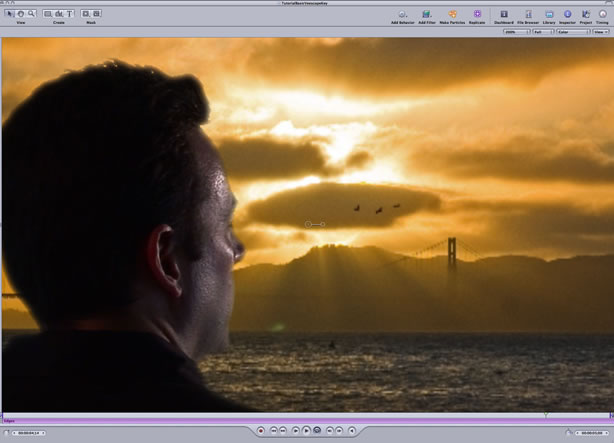
Turn the “Chroma Key” filter back on.
The green around the edges should now be gone.
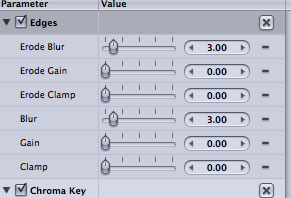
Enable the “Edges” filter.
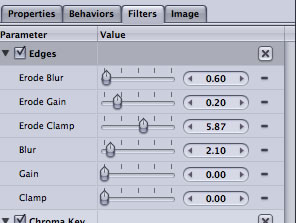
The foreground should now have a blurry look to it.
The “Edges” allows you to create a natural transition between the foreground and the background. Change the controls to the following values
The transition should now look fairly natural and smooth.
|
|||